
I’m a bit of an automotive electrical dunce. I did try to resolve this by buying a book about motorcycle electrics… but it turns out for that to really be effective, you have to both read and understand it.
Wiring in the dashboard on Kat’s 2cv almost killed me… (but in my defence, every wire on a 2cv is green - and only coloured end caps help you distinguish one wire from another, which is great until you find more than one with the same coloured end cap.)
But… I really really want to wire in a USB charger on my new toy, the Honda Helix. Time to exorcise some electrical demons…
Getting stuck in…
My Helix is the best part of 30 years old. And that means there’s potential for lots of previous bodging before I got there… but at first glance, the issues were:
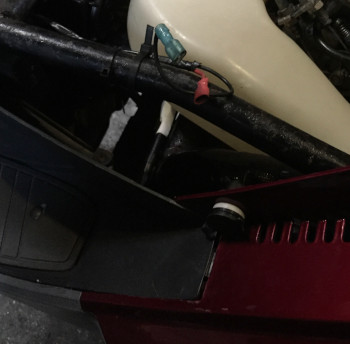
- A random plug by the seat - I’m assuming to connect heated clothing or an intercom or something
- An LED on the dash, that doesn’t actually do anything.
- A mysterious red switch on the dash - which lights up when you turn it on (with the ignition on) but does (you guessed it) nothing.
- A broken temperature gauge
Plus whatever else I might find. On the plus side, there’s already a cigarette lighter sized hole in the Helix dashboard - so I don’t have to get creative with a holesaw… and I’d already found what looked like the perfect charger.
Step one - the random plugs
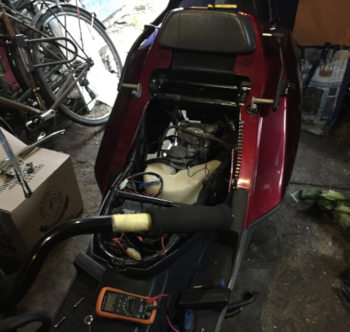
Removing the seat grants access to the top of the motor and the battery. Which had not one but two additional sets of wires with inline fuses running straight from the battery. I traced the wires to the plug and removed them, as well as disconnecting the leads that were connected staight to the battery.
And the other wire from the battery?
An alarm. Really, a cheap and nasty looking alarm, that didn’t appear to have power to it. It was attached behind the battery - using sticky fasteners and cable ties. :( So that also explains my:
LED on the dash…
Removing a service panel on the dashboard grants access to the coolant filler, the indicator bulbs and a big stack of wiring.
I could just snip the wires from the LED, and then just pull them back through the bodywork. Which means I could pull out the alarm. Removing the LED meant leaving a hole. So I left the LED in the hole. Simple.

The service panel is also connected to…
the mysterious red switch.
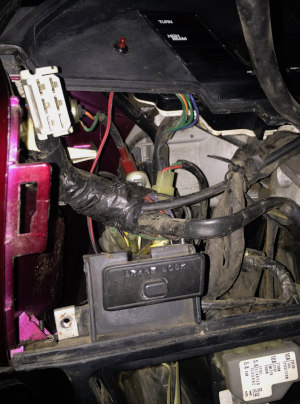
This took a lot of figuring out. There was all kinds of additional wiring, scotchlock connectors, random connector blocks, and lots of and lots of electrical tape. Oh, and some additional inline fuses, run into the glovebox.
As a luxury pseduo car replacement… (my other half Kat refers to it as an urban Goldwing) one of the factory options on the Helix was a Kenwood FM Radio with presets and everything. These are now rare, expensive, and probably a bit rubbish. So why am I telling you this?
Honda included a plug on the wiring loom for the stereo. I can’t read wiring diagrams but can just about work Google… and was able to find out how that plug is wired.
Basically:
- Red is permanent live - so you don’t lose your FM radio presets
- Black is live with the ignition on (this is what I need for my USB socket!)
- Green is earth
but
Someone had been there before…
It looked like the accessory connector had been cut into, and then spliced into Frankenstein’s rat’s nest of wire, scotchlocks, random connectors, and best of all, lots of electrical tape. I’m guessing this was for heated gloves, or heated grips or similar, as there were wires running up the bars, cabled tied in.
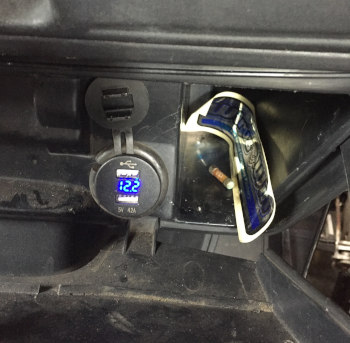
My first thought was to reuse the mysterious red switch. I’d remove the wiring that once went to the bars, run that to my USB socket - and have an on/off switch available. But despite reading 12v at the wires when the red switch was on, when I added the USB socket, its built in volt meter read nothing. My guess is the old, tired, shonky old wiring added too much resistance.
Time for plan B…
Inspired by Bill Laudeman it was time to start again.
Step one was being brave enough to just unplug all the additional wiring from the radio connector. The bike still runs, and everything still seems to work. So that’s a good start.
Still feeling suitably brave, it was time to unwrap the crappy wiring, and just pull it all out. I felt bad attacking the original Honda connector - but it had already been chopped into anyway. I also took the opportunity to remove the random additional inline fuses.
I made a “cheater plug” just like Bill - and, again, like Bill, ran my earth lead to the coolant filler mounting bolt. I could then connect to the red wire - for a permanently live charger, or move to the black lead for power only with the ignition on… which is what I wanted.
The charger fitted nicely into the accessory socket hole, and whilst it’s not factory - it looks pretty neat.
I’m looking forward to some distance runs, with my phone tucked away on charge in the glovebox - paired to a bluetooth receiver, so I can catch up with podcasts and tunes.
So - I still have to work out what’s wrong with the temperature gauge… and should give the bike a basic service, but I’m pretty pleased with what I’ve achieved this weekend.